若要将应用程序连接到 API for GraphQL,需要三个重要信息:客户端 ID、租户 ID 和 Fabric 中的 GraphQL 终结点地址。 在以下部分中,我们将展示如何创建和检索所需的所有详细信息,以及如何使用示例应用程序访问 API。
先决条件
在连接应用程序之前,必须拥有 Fabric API for GraphQL。 有关详细信息,请参阅在 Fabric 中创建 GraphQL API 并添加数据。
目前,API for GraphQL 要求应用程序使用 Microsoft Entra 进行身份验证。 应用程序需要正确注册和配置,以便对 Fabric 执行 API 调用。 有关详细信息,请参阅在 Azure 中创建 Microsoft Entra 应用。
调用 API 的经过身份验证的身份凭据(用户主体、服务主体或托管标识)需要对 GraphQL API 拥有执行操作的权限(添加直接访问权限时需选择运行 Queries 和 Mutations 选项),如果在 API 中选择单一登录(SSO)作为连接选项,则需相应在所选数据源中具备读取或写入权限。 有关详细信息,请参阅连接到数据源并构建架构。
创建 Microsoft Entra 应用
在以下步骤中,我们将展示如何在 Microsoft Entra 中配置对 ReactJS 应用程序的支持。
- 使用快速入门:使用 Microsoft 标识平台注册应用程序中所述的步骤注册应用程序。
- Microsoft Entra 应用“应用程序(客户端) ID”和“目录(租户) ID”值显示在“摘要”框中。 以后根据需要记录这些值。
- 在“管理”列表下,选择“API 权限”,然后选择“添加权限”。
- 添加 PowerBI 服务,选择 委派权限,然后选择 GraphQLApi.Execute.All 权限。 确保不需要管理员同意。
- 返回到“管理”列表,选择“身份验证”“添加平台”“单页应用程序”。>>
- 出于本地开发目的,请在“重定向 URI”下添加
http://localhost:3000,并确认应用程序是否已启用具有代码交换证明密钥 (PKCE) 的授权代码流。 选择“配置”按钮以保存所做更改。 如果应用程序收到与跨原点请求相关的错误,请使用相同的重定向 URI 在上一步中添加“移动和桌面应用程序”平台。 - 返回到“授权”,向下滚动到“高级设置”,然后在“允许公共客户端流”下,对“启用以下移动和桌面流”选择“是”。
为应用程序访问设置示例 GraphQL API
在本例中,我们创建了一个 GraphQL API 来向客户端公开示例湖屋数据。
在 Fabric 门户主页中,从工作负荷列表中选择“数据工程”。
在数据工程体验中,选择“使用示例”,然后在“湖屋”下选择“公共节假日”,以自动创建新的包含公共假日数据的湖屋。

按照创建 API for GraphQL 中的步骤进行操作,创建新的 GraphQL API,然后选择创建的湖屋。 添加公共节假日表,以允许客户端访问此数据。

使用以下示例查询在 API 编辑器中测试 GraphQL API。 这与我们在 React 客户端应用程序中使用的查询相同:
 query {
   publicholidays (filter: {countryRegionCode: {eq:"US"}, date: {gte: "2024-01-01T00:00:00.000Z", lte: "2024-12-31T00:00:00.000Z"}}) {
     items {
       countryOrRegion
       holidayName
       date
     }
   }
 }
在 API 项的工具栏上选择“复制终结点”。

在“复制链接”屏幕中,选择“复制”。

正如之前记录的 Microsoft Entra 应用的客户端 ID 和租户 ID,稍后根据需要复制终结点 URI。
配置 React 应用以访问公共节假日 API
我们从现有 React 应用着手。 按照创建 React 单页应用程序并准备将其用于身份验证教程中的所有步骤创建一个已配置 Microsoft Entra 身份验证的 React 项目,包括添加到项目结构所需的其他文件和文件夹。 我们只需要更改三个文件就可以使应用适应 GraphQL 用例。
在 src 文件夹中,打开 authConfig.js 文件,并将文件的内容替换为以下代码片段:
 /*
  * Copyright (c) Microsoft Corporation. All rights reserved.
  * Licensed under the MIT License.
  */

 import { LogLevel } from "@azure/msal-browser";

 /**
  * Configuration object to be passed to MSAL instance on creation.
  * For a full list of MSAL.js configuration parameters, visit:
  * https://github.com/AzureAD/microsoft-authentication-library-for-js/blob/dev/lib/msal-browser/docs/configuration.md
  */

 export const graphqlConfig = {
     graphqlEndpoint: "`Enter_the_GraphQL_Endpoint_Here"
 };

 export const msalConfig = {
     auth: {
         clientId: "Enter_the_Application_Id_Here",
         authority: "https://login.microsoftonline.com/Enter_the_Tenant_Info_Here",
         redirectUri: "http://localhost:3000",
     },
     cache: {
         cacheLocation: "sessionStorage", // This configures where your cache will be stored
         storeAuthStateInCookie: false, // Set this to "true" if you are having issues on IE11 or Edge
     },
     system: {
         loggerOptions: {
             loggerCallback: (level, message, containsPii) => {
                 if (containsPii) {
                     return;
                 }
                 switch (level) {
                     case LogLevel.Error:
                         console.error(message);
                         return;
                     case LogLevel.Info:
                         console.info(message);
                         return;
                     case LogLevel.Verbose:
                         console.debug(message);
                         return;
                     case LogLevel.Warning:
                         console.warn(message);
                         return;
                     default:
                         return;
                 }
             }
         }
     }
 };

 /**
  * Scopes you add here will be prompted for user consent during sign-in.
  * By default, MSAL.js will add OIDC scopes (openid, profile, email) to any login request.
  * For more information about OIDC scopes, visit:
  * https://docs.microsoft.com/azure/active-directory/develop/v2-permissions-and-consent#openid-connect-scopes
  */
 export const loginRequest = {
     scopes: ["https://analysis.windows.net/powerbi/api/GraphQLApi.Execute.All"]
 };

 /**
  * Add here the scopes to request when obtaining an access token for MS Graph API. For more information, see:
  * https://github.com/AzureAD/microsoft-authentication-library-for-js/blob/dev/lib/msal-browser/docs/resources-and-scopes.md
  */
 export const graphConfig = {
     graphMeEndpoint: "https://graph.microsoft.com/v1.0/me",
 };
正如上面的代码所示,请务必使用正确的范围来访问应用程序。 在本例中为
https://analysis.windows.net/powerbi/api/GraphQLApi.Execute.All。将以下值替换为 Microsoft Entra 管理中心的值。
-
clientId- 应用程序的标识符,也称为客户端。 将Enter_the_Application_Id_Here替换为先前在已注册 Microsoft Entra 应用程序的概述页面中记录的“应用程序(客户端) ID”值。 -
authority- 它是由两个部分组成:- “实例”是云提供程序的终结点。 在“国家云”查看可用的不同终结点。
- “租户 ID”是在其中注册应用程序的租户的标识符。 将 Enter_the_Tenant_Info_Here 替换为注册应用程序的概述页中先前记录的“目录(租户) ID”值。
-
graphQLEndpoint- Fabric API for GraphQL 终结点。 将Enter_the_GraphQL_Endpoint_Here替换为前面记录的 GraphQL API 终结点。
-
保存文件。
在相同的 src 文件夹中,打开 App.js 文件,并将文件的内容替换为以下代码片段:
 import React, { useState } from 'react';
 import { PageLayout } from './components/PageLayout';
 import { loginRequest, graphqlConfig } from './authConfig';
 import { ProfileData } from './components/ProfileData';
 import { AuthenticatedTemplate, UnauthenticatedTemplate, useMsal } from '@azure/msal-react';
 import './App.css';
 import Button from 'react-bootstrap/Button';
 import Spinner from 'react-bootstrap/Spinner';

 /**
 * Renders information about the signed-in user or a button to retrieve data about the user
 */
 const ProfileContent = () => {
   const { instance, accounts } = useMsal();
   const [graphqlData, setGraphqlData] = useState(null);
   const [display, setDisplay] = useState(false);

   function RequestGraphQL() {
       // Silently acquires an access token which is then attached to a request for GraphQL data
       instance
           .acquireTokenSilent({
               ...loginRequest,
               account: accounts[0],
           })
           .then((response) => {
               callGraphQL(response.accessToken).then((response) => setGraphqlData(response));
           });
   }

 async function callGraphQL(accessToken) {
   setDisplay(true);
   const query = `query {
     publicholidays (filter: {countryRegionCode: {eq:"US"}, date: {gte: "2024-01-01T00:00:00.000Z", lte: "2024-12-31T00:00:00.000Z"}}) {
       items {
         countryOrRegion
         holidayName
         date
       }
     }
   }`;
   fetch(graphqlConfig.graphqlEndpoint, {
           method: 'POST',
           headers: {
               'Content-Type': 'application/json',
               'Authorization': `Bearer ${accessToken}`,
           },
           body: JSON.stringify({
               query: query
           })
       })
       .then((res) => res.json())
       .then((result) => setGraphqlData(result));
 }

   return (
       <>
           <h5 className="card-title">Welcome {accounts[0].name}</h5>
           <br/>
           {graphqlData ? (
               <ProfileData graphqlData={graphqlData} />
           ) : (
               <Button variant="primary" onClick={RequestGraphQL}>
                   Query Fabric API for GraphQL Data
                   {display ? (
                         <Spinner
                             as="span"
                             animation="border"
                             size="sm"
                             role="status"
                             aria-hidden="true"
                         />
                     ) : null}
               </Button>
           )}
       </>
   );
 };

 /**
 * If a user is authenticated the ProfileContent component above is rendered. Otherwise a message indicating a user is not authenticated is rendered.
 */
 const MainContent = () => {
   return (
       <div className="App">
           <AuthenticatedTemplate>
               <ProfileContent />
           </AuthenticatedTemplate>

           <UnauthenticatedTemplate>
               <h5>
                   <center>
                       Please sign-in to see your profile information.
                   </center>
               </h5>
           </UnauthenticatedTemplate>
       </div>
   );
 };

 export default function App() {
   return (
       <PageLayout>
           <center>
               <MainContent />
           </center>
       </PageLayout>
   );
 }
保存文件。
最后,在 src/components 文件夹下,打开 ProfileData.jsx 文件,并将文件的内容替换为以下代码片段:
 import React from "react";
 import ListGroup from 'react-bootstrap/ListGroup';
 import Table from 'react-bootstrap/Table';
 /**
  * Renders information about the user obtained from MS Graph
  * @param props
  */
 export const ProfileData = (props) => {
   const holidays = props.graphqlData.data.publicholidays.items;
   return (
     <Table striped bordered hover responsive>
     <thead>
       <tr>
         <th>Country</th>
         <th>Holiday</th>
         <th>Date</th>
       </tr>
     </thead>
     <tbody>
       {holidays.map((item,i) => (
       <tr key={i}>
         <td>{item.countryOrRegion}</td>
         <td>{item.holidayName}</td>
         <td>{item.date}</td>
       </tr>
       ))}
       </tbody>
     </Table>
 )};
保存所有文件更改。
在所选终端应用程序中,转到 React 项目的根文件夹,并执行命令
npm start以在本地测试应用程序。应用程序从
http://localhost:3000加载到浏览器后,请按照从应用程序调用 API 教程的最后一部分的步骤进行身份验证。登录后,单击“查询 Fabric API for GraphQL 数据”按钮。
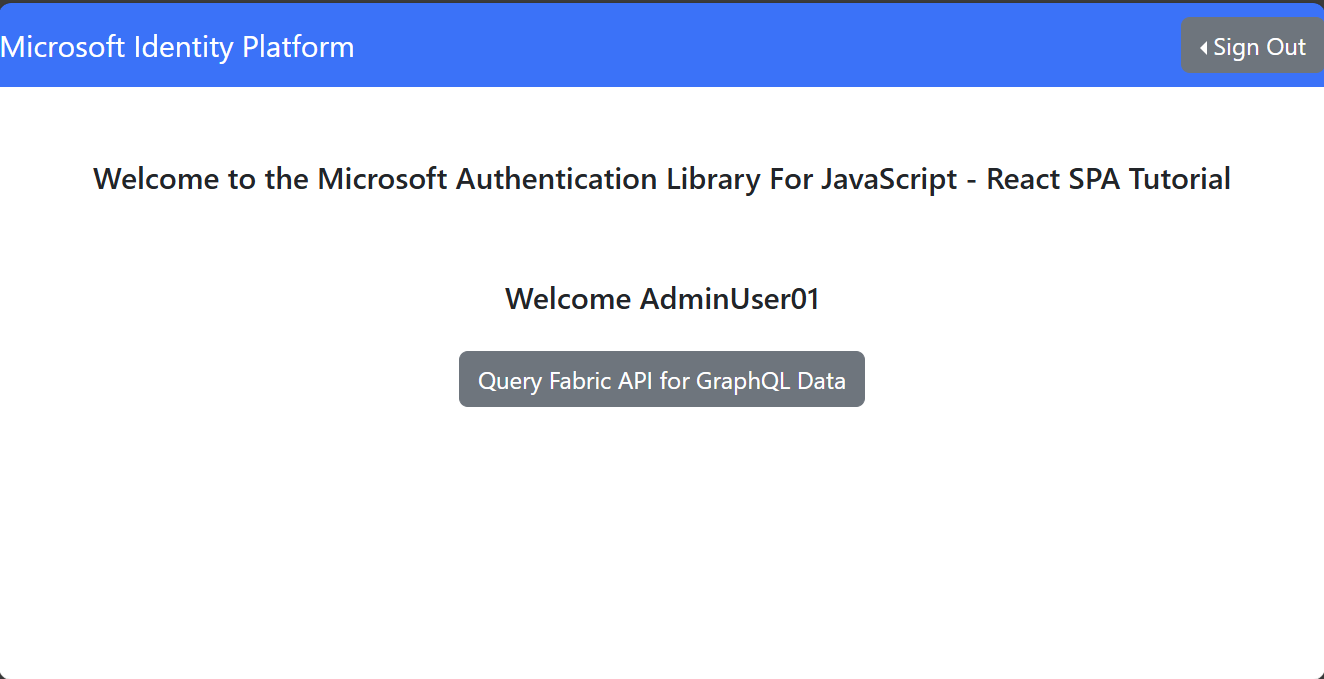
成功向 Fabric 中的 GraphQL API 发出经过身份验证的请求会将 GraphQL 查询中的数据返回到 React 客户端应用程序中的湖屋:

其他语言
在 Microsoft Fabric 示例 GitHub 存储库中查找用于连接到 GraphQL API 的 C#、Python 和其他语言示例。